Using Steam to Remove Blackheads: An Easy and Effective At-Home Skincare Method
In today’s fast-paced world, stress, pollution, and a busy lifestyle often lead to common skin issues like blackheads and clogged pores. I’ve tried countless methods to get rid of blackheads, but one technique stands out for being simple, effective, and incredibly relaxing—steam treatment. Today, I want to share with you how to use steam to remove blackheads right in the comfort of your home, turning this cleansing step into a soothing self-care ritual. With just a few household items and a bit of time, you can deeply cleanse your pores and improve your skin’s overall health.
I. Preparation: Creating a Relaxing Steam Bath at Home
Before we dive into the steam treatment, it’s important to set the stage for a relaxing and effective experience. This isn’t just about cleansing your skin; it’s also a moment to unwind and connect with yourself. Here’s what you’ll need and the steps to follow:
1. What You’ll Need
- A Towel: To cover your head and trap the steam around your face.
- Hot Water: Not boiling, but hot enough to generate steam.
- A Large Salad Bowl: To hold the hot water and release steam.
- Essential Oils or Tea Bags: Depending on your skin type, choose oils or tea bags to enhance the experience.
- Soothing Music: To create a calming atmosphere and enhance your overall experience.
Recommended Brands: For essential oils, I personally love Aromatherapy Associates. Their Lavender Oil is perfect for dry skin, while Eucalyptus and Grapefruit Oils are ideal for oily skin. These oils are high in purity and have a natural, calming scent that helps relax both your mind and body.
2. Heat the Water
Heat the water until it’s near boiling, around 60-70 degrees Celsius (140-160 degrees Fahrenheit). The goal is to have hot steam without risking burns to your skin.
3. Pour the Water into the Salad Bowl
Once the water is ready, carefully pour it into your large salad bowl. For those with dry skin, add a few drops of Lavender Essential Oil for a soothing, hydrating touch. If you have oily skin, Eucalyptus or Grapefruit Oil can help balance and purify. No essential oils at home? No worries—use two green tea or chamomile tea bags instead! These ingredients offer antioxidant benefits that are great for your skin.
Pro Tip: If your skin is particularly sensitive in certain areas (like my cheeks), apply a thick layer of moisturizer on those spots before starting. This acts as a protective barrier, shielding delicate skin from the steam’s heat.
II. The Steam Process: Enjoy a Moment of Relaxation
1. Embrace the Warmth of the Steam

Lean your face over the bowl, keeping a comfortable distance from the water, and cover your head with the towel to trap the steam around your face. This is the time to unwind—put on some relaxing music, close your eyes, and let the warmth envelop you. I personally cherish these moments as the steam gently softens my skin, and my pores gradually open up, creating a warm, therapeutic experience.
You can stay in this position for about 10 to 15 minutes. During this time, the steam will work its magic, softening the sebum that clogs your pores and making it easier to remove blackheads.
Music Recommendation: I often choose meditation music from the Calm app, which offers natural, soothing sounds that help relax your nerves and put you in a peaceful state of mind.
2. Time to Clean Those Pores
Once your pores are open, resist the urge to immediately splash cold water on your face, as this will cause them to close and undo all the progress you’ve made. Now, it’s time to gently cleanse the blackheads while your skin is still warm and soft.
Make sure your hands are clean, then wrap your fingers in tissue (hygiene is crucial!). Use the pads of your fingers—not your nails—to gently press on the areas with blackheads. Be patient and careful to avoid scratching your skin, which could cause scars. This process may sting a bit, but that’s normal. Think of it as a moment to release your frustrations and see immediate results on your skin.
3. Soothe Your Skin with a Mask
After you’ve thoroughly cleansed your nose and other problem areas, you’ll likely feel a sense of relief and lightness on your skin. This is the perfect time to apply a soothing face mask to calm and nourish your freshly cleansed skin. With your pores open, the mask’s ingredients will penetrate deeply, enhancing the benefits.
Recommended Product: I highly recommend the FRESH Rose Face Mask. It’s infused with real rose petals and hydrates deeply, helping to calm and rejuvenate your skin after extraction. The cool, gel-like texture feels refreshing and provides instant relief to the skin.
III. Post-Treatment Care: Locking in Moisture and Repairing Your Skin
Though the steam treatment may be over, the care for your skin doesn’t end here. It’s essential to seal the pores and nourish your skin to maintain a clean and healthy complexion.
1. Use a Toner to Tighten Pores
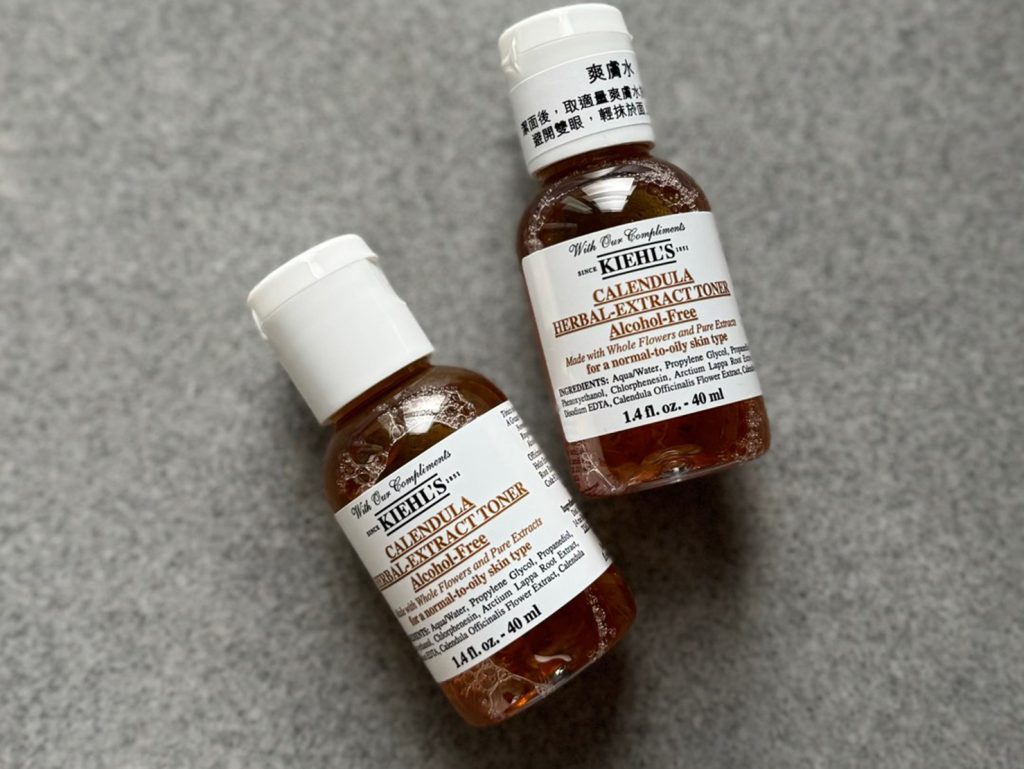
After removing the mask, gently pat your face with a toner designed to tighten pores. This step helps reduce pore visibility and gives your skin a fresh, clean finish.
Recommended Product: Kiehl’s Calendula Herbal-Extract Toner is a great choice, featuring soothing calendula petals that calm and balance the skin. It’s alcohol-free, making it suitable even for sensitive skin, especially after a steam treatment.
2. Deep Moisturization
Follow up with a hydrating serum or moisturizer rich in hyaluronic acid to lock in moisture and promote skin healing. This step ensures your skin remains plump, soft, and hydrated throughout the day.
Recommended Product: Estée Lauder Advanced Night Repair Serum, also known as the Little Brown Bottle, is packed with high concentrations of hyaluronic acid. It effectively locks in moisture and boosts your skin’s repair process, leaving it soft, elastic, and glowing.
Embrace the Ritual of Steam for Healthier Skin
Steam treatment for blackhead removal is not just a simple, effective at-home skincare method; it’s a moment of self-care that can transform your daily routine into a mindful ritual. By using a few simple items, you can enjoy a spa-like experience in the comfort of your home. For me, this process is not only about deep-cleaning my skin but also about dedicating time to myself, feeling the warmth, and indulging in a quiet, calming moment.
I hope this guide inspires you to incorporate steam treatments into your skincare regimen, turning a basic cleansing step into a luxurious experience. Remember, great skin doesn’t always require expensive products or complicated routines—it’s the small, consistent actions that make the biggest difference. May every steam session bring you closer to healthier, glowing skin and a little peace in your day.
